Chandeliers
Last week I took a card tricks class at my nearest Michael’s craft store. It was $25 to take the class but does not include the needed supplies. With the syllabus and receipt, you do at least get 10% off your purchase. All of that only matters if you are learning something new or want to duplicate the example cards exactly. I had a special situation because I was the only one in the class and the instructor came in just for me. It was a two hour class and she let me use the classroom’s supplies and leftovers. Here are the three cards I had time to make.
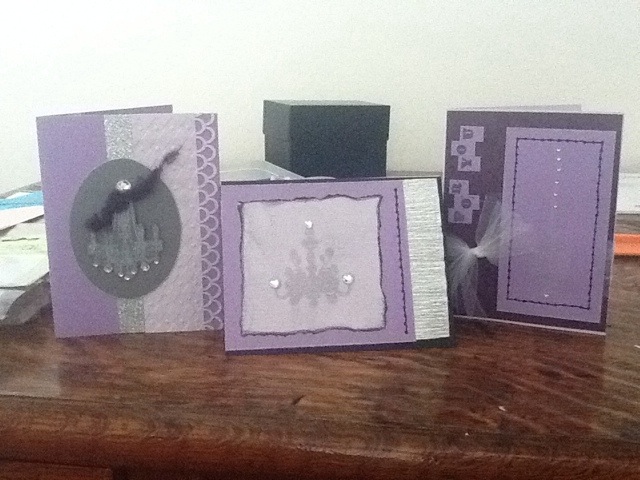
The tricks and tools that the class showcased was two different types of embossing, paper piecing, faux stitching, tearing, and water-mark ink. Some embellishments I had never used before were the glitter tape, rhinestones, and glitter shapes. One trick I learned that I’d like to share with you is the faux stitching. All you need is a paper piercer and fine tip marker. Once you decide where you want your stitching to be, evenly poke holes along that path. In the class, I just did straight lines around the edges and used a ruler. If your eye and hand is good enough, you could probably even faux stitch wording. Once your paper is pierced, take your fine tipped pen and apply the ink to the first hole. Let it soak in the hole for just a moment then draw a straight line (for straight stitching) to the next hole. Again, hold it for a moment for the hole to soak up the ink and draw your next line. The more smooth the lines the more like actual sewing it should look! If you like this set of Chandelier Notecards, click the link to buy them. Also, look up a Michael’s near you to find a class that suits your crafting needs!